Monday, September 27, 2010

So Foxy

In this project we had to sculpt an animal out of soap and then destroy him. At first, I thought this would be pretty easy but sculpting soap is not only hard, but also extremely smelly. I purchased my bar of soap at Marshall's and was hoping it would stay true to the "scentless" reference on the package but it did not. Soap will never be completely scentless. I did smell extremely clean no matter what though. Even with that hurdle, I was thrown another curve ball. We were to complete our carved animal in class! I was not expecting that and was emotionally not prepared for that. My sweet little fox turned out to be a little pest for two hours. 

Because I had purchased the biggest bar of soap imaginable, I had no idea where to begin so I just started shaving away as much soap as I could. Then i attempted to carve out the legs first and then shape the back along the way. At this moment I realized that I am not a sculptor and my respect for them went up right then. I did learn a lot along the way though, about visualizing measuring and spacing things out. 

When I finally finished my soap fox, I had to come up with a creative way to destroy him. I went through idea after idea and was stuck on somehow melting him away. Obviously water would do the trick but that was time consuming and my teacher had already told the class about a previous student washing their hands with their soap creation so i could not do that. I ended up trying to mix household chemicals together like bleach, windex, and nail polish remover. For some reason I thought this mixture would create a bubbling liquid that would instantly melt the soap fox in a really cool way but that did not happen. I even tried to let him melt in the hot sun and that didn't work. Even sticking him in a fish bowl of bleach with red dye did absolutely nothing. So then I decided I would make a stop motion mini film. I did not have a plan going into it but I liked the final result. Check it out below. 

165 pictures compiled into a mini movie. (:


I do not have process picture of my fox because I was unaware the soap carving had to be finished in class and did not have my camera. Even if I would of had my camera, taking a picture with soap stuck to my hands would of ruined my camera, and there was no easy way of getting the clumps of soap off of my hands. 

Tuesday, September 14, 2010

Make Your Bed

Our first official project was to make our bed completely out of paper and ink only. My bed is quit simple on top with a white comforter and white pillows but underneath, my blankets are a little more detailed but still sticking with the simple black and white. My second comforter has detailed flowers in white with a black background and the other side is the inverse of that. Then i have my blanket which has black polka-dots. 
 
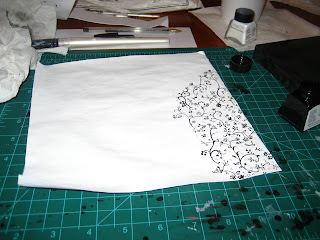
For the polka-dot comforter, i dipped the wrong end of a paint brush in ink and pressed it against paper. This gave me different sized dots, which I was unsure of at first, but it gave the illusion of the bed having depth at different angles. The second comforter, with the flower detail, was very time consuming. I tried to replicate the exact patterns by examining the blanket while I painted the flowers. I even did the reverse  side. To get them to stick together like it was one complete blanket I had to place them on top of each other, with blank sides touching, and fold the edges together then I used water to kind of glue the two pieces together. It was extremely tough to put the water on the ink and not smear it off but I did it. 

Next came the pillows. I tried many different ways to make a pillow but ended up crinkling the paper as much as I could without ripping it and then folding it in half and watering the edges, just like i did with the flowered comforter. I then crumbled paper together and wet the wads, let them dry, and then put them inside the pillow cases to give them an actual pillow effect. 

Finally, with all of my bedding finished, I could work on my bed frame. This was a task because I just have a solid black headboard with nothing else. I tried to replicate how my bed frame actually is but putting two rolled up pieces of paper through paper and then sticking the ends through a black rectangular like box i made from origami. It worked out but is pretty fragile. 

here are a couple pillows with my mattress. 
the base. The two tubes attached in the headboard too.
I clumped up pieces of paper and soaked them, then
 after they dried I used them as pillow stuffing. 

white side of comforter (process)

this side should be easy...
looking good.
almost done...
close enough.

black side of comforter (process)


the beginning of one side of my comforter.
feeling good.
almost half way?
after two hours it feels like.
wishing I was done.
ahh finally finished!

Saturday, September 11, 2010

Made My Bed


actual bed
paper bed
finished. 


paper folding


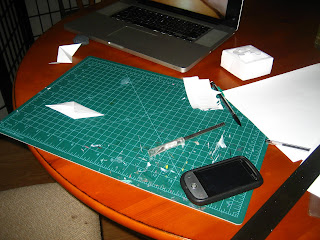
supplies: cutting board, paper, x-acto knife. ready, go!
After I finished folding my box, i carved a koi fish on
 the bottom so that would become the top. 
The koi box and another origami object
 (I ended up not using the left one).
I only had a picture of this one on my phone, but I also folded 
this origami object. There were thirty pieces of folded paper 
that I attached together. I also hung two pieces of paper 
that held an origami heart in the center.

Thursday, September 9, 2010

bienvenue

Currently I am unable to move my body so I took time to finally make my blog. It will contain a collection of my artwork, including the process it takes and the finished project. I will also include my own photography, past artwork, and personal entries. 


Hope you enjoy!